Homegrown foods can enhance your health, reduce impact on the environment, and lead to cost savings. Here’s how to start your own food garden at home.
Imagine a life where dinner grows just outside your window. Fresh vegetables at the reach of your hand. No plastic packaging, no carbon footprint, just the quiet satisfaction of nourishing yourself with nature’s best.
Sounds idyllic, right? For many, growing their own food seems like a dream, as it may at first sound too overwhelming and time-consuming to start your own home garden.
Let’s make 2024 your year to ditch the grocery aisles and embrace homegrown goodness. This practical guide is your passport to a greener, more sustainable plate. We’ll break down the process into bite-sized, actionable steps, from choosing the right crops for your climate to mastering container gardening secrets.
Top benefits of growing your own food
We’d actually have to spend more time coming up with reasons why NOT to grow your own food. Yes, the benefits of having a home garden are so numerous, and here are a few:
- Homegrown veggies boast higher levels of vitamins and antioxidants, like cherry tomatoes bursting with lycopene or leafy greens overflowing with folate
- Supermarket produce pales in comparison to the taste of homegrown vegetables and fruits
- Growing your own food helps reduce your carbon footprint, slashing food miles, cutting out refrigeration needs, and minimizing plastic packaging
- Over time, homegrown goodness translates to serious savings as you’ll be snipping fresh herbs instead of buying overpriced bundles and harvesting a basket of cherry tomatoes for your salad instead of grabbing plastic containers
- Gardening is a stress-buster and a joyful activity for the whole family, providing a valuable lesson for your kids
Before you start planting: Assess the space and resources
Before you find yourself in dirt up to your elbows, assess your green thumb potential, meaning that you need a plan. Choosing the plants you want to grow comes after you determine what space, sunlight, watering, and soil options are in play.
Here are some questions to answer:
- Do you have a balcony, a small backyard, a porch, a big front lawn? What size is the space you’re planning to grow plants in? (Don’t worry if you only have a tiny balcony. It can sprout some serious green goodness.)
- How much sunlight does my potential garden area receive throughout the day? (Most veggies crave sunshine, so map out your space and see where the light hits.)
- Can I easily access water for regular plant hydration? Can I implement a watering system? (This is usually in case you have an outdoor garden.)
- How much time can I realistically dedicate to tending my garden each week? (You don’t want this project to turn into a waste of time and money—plant maintenance needs vary.)
- How much am I willing to invest in soil, seeds, tools, and any necessary infrastructure? (If you’re starting from scratch, you may need some capital to invest.)
- What veggies and fruits do I actually enjoy eating fresh? (Don’t plant something you dislike just because it’s easy to grow.)
- What types of plants thrive in the sunlight conditions I have available? (Time to do some research!)
- Am I prepared to deal with potential pests or diseases that might threaten my precious greens? (Any allergies to chemicals?)
- Do I see myself maintaining this garden for years to come? (Consider your lifestyle and future plans.)
- Are there local gardening groups or resources I can tap into for support and advice? (It’s always a good idea to connect with like-minded people.)
What tools should you have in your gardening toolkit?
As a home garden beginner, you don’t need a ton of fancy tools to get started. In fact, it’s best to keep it simple and add new tools as your garden grows and your needs change. Here are some essentials to get you going.
Absolute must-haves:
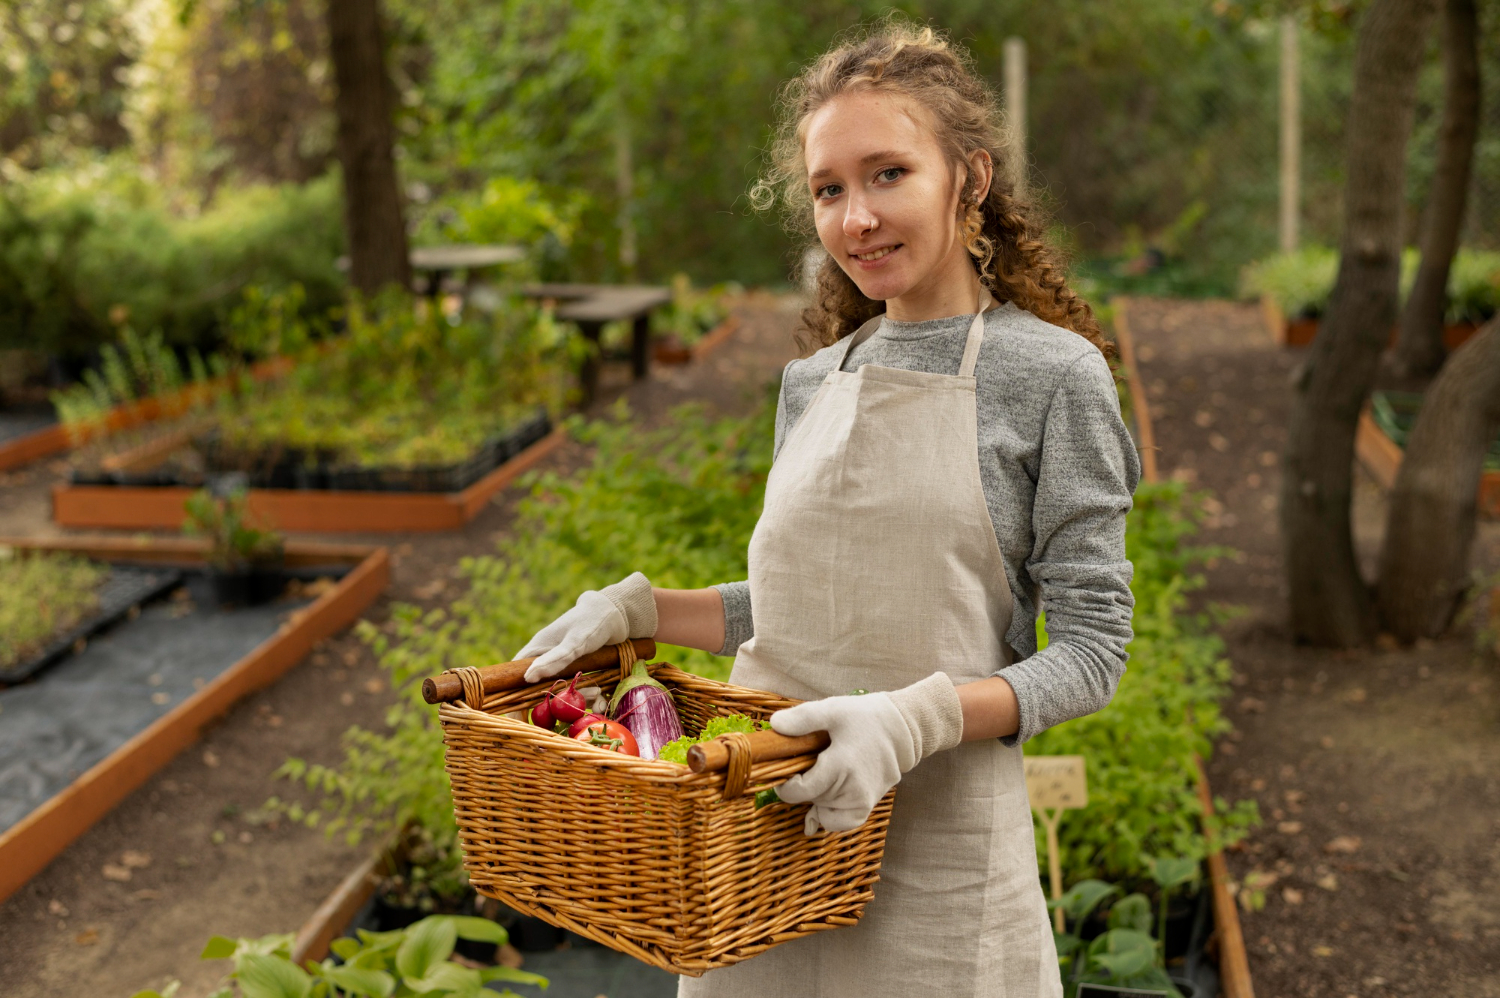
- Gardening gloves to protect your hands from dirt, thorns, and blisters
- Hand trowel for digging small holes, planting seedlings, and scooping soil
- Watering can with a gentle spray nozzle is perfect for delicate plants and seedlings
- Gardening fork (three-pronged) that loosens soil and aerates it, which is essential for healthy plant growth
- Hand pruners to trim small branches, deadhead flowers, and harvest herbs
Optional, but helpful:
- Spade for digging larger holes and turning over soil
- Hoe for weeding and cultivating soil
- Rake to smoothe soil, spread mulch, and collect leaves
- Watering hose to makes watering a large garden easier
- Seed starter kit if you’re planning to start seeds indoors before moving them to your garden
- Kneeling pad to save your knees from the ground during weeding and planting
Choosing what to grow in your home garden
Once you’ve assessed your space, here comes the fun part: picking your plants. posse! But don’t just grab the first flashy seed packet you see. We have to choose smart and choose easy, especially if you’re a newbie.
Tomatoes, peppers, zucchini, and summer squash thrive in sunshine. They’re practically maintenance-free and reward you with deliciousness all summer long.
Leafy greens like lettuce, spinach, and kale do just fine with a bit less sun. Herbs like cilantro, mint, and parsley also love a shady nook, filling your kitchen with their amazing fragrance.
Living in a hot and humid climate? Opt for heat-loving okra, eggplant, and leafy greens like Malabar spinach. Bonus points for planting some curry leaves or lemongrass.
For more temperate climates, root vegetables like carrots, beets, and radishes are ideal. Herbs like oregano, thyme, and sage will also flourish in these milder conditions. You can even try your hand at some leafy greens like kale and collard greens.
However, you shouldn’t just plant what “they” say. Think about what you actually love to eat! Craving crunchy carrots? Go for it! Can’t get enough fresh basil? Make that your mission. Choose plants that make your taste buds happy.
How to prepare the soil for planting
Think of soil as the foundation of your plant kingdom. It’s where your leafy friends get their nutrients, hydration, and anchorage to reach for the sky. So, keeping it healthy is crucial.
Before you jump in and start tossing seeds into the ground, it’s wise to understand what’s already going on in your soil. A soil test is like a mini-detective kit, revealing the pH level (acidity or alkalinity), nutrient content, and even potential pests or diseases. Knowing these things helps you tailor your soil to your plants’ specific needs.
Once your soil test results are in, it’s time for next steps based on what the verdict is:
- If your soil’s pH is too high (alkaline) or too low (acidic), plants can’t properly absorb nutrients. Lime helps raise pH, while sulfur or compost can lower it. Think of it as balancing the party atmosphere for your plant pals!
- Lacking nitrogen? Leafy greens like alfalfa or clover can add a nitrogen boost. What about potassium? Wood ash or kelp meal can come to the rescue.
- Is your clay soil holding water like a sponge? Add sand or perlite to improve drainage and prevent root rot.
Now, not all plants are created equal, and neither is their soil preference. Some like it sandy and well-draining, like cacti. Others prefer a rich, moisture-retaining loam (think tomatoes enjoying sunlight). Do your research and match the soil type to your plant’s personality for optimal growth.
Best practices for container gardening
Soil preparation and container setup might seem a little technical, but it’s like the secret to getting your garden thriving. Containers indeed need some basic prep to be plant-friendly.
Choose containers with drainage holes to avoid waterlogging, and consider the material. Clay pots breathe well but dry out faster, while plastic retains moisture better. Match the pot size to the plant’s mature size.
Before welcoming your plant guests, add a layer of gravel or broken pottery at the bottom of your pot to improve drainage. Then, fill it with a good-quality potting mix, making sure your plants have a comfy “bed” to enjoy.
Raised beds are like elevated gardens, perfect for areas with poor soil or limited space. Build yours with bricks, wood, or even recycled materials, and fill it with a mix of topsoil, compost, and sand for happy plants.
Planting techniques: Seeds vs. seedlings
Now that you’ve got your soil prepped and ready to party, it’s time to welcome the stars of the show—your plants. The two main routes to plant parenthood are seed starting and seedling adoption.
Seed starting
Think of seed starting as a rewarding experience, like watching your kids grow up. Here are the main pros and cons of this technique:
Pros:
- Get access to unique plant babies you might not find as seedlings
- Save money as seeds are typically cheaper than pre-grown plants
- Witness your plant’s journey from seed to sprout to experience full gardening satisfaction
Cons:
- Takes longer than using seedlings (sometimes weeks and months)
- Needs some more care and understanding of seed needs (moisture, light, etc.)
- Not suitable for impatient gardeners who want instant gratification
If you choose seed starting, here’s a brief beginner’s guide:
- Gather your gear—seed trays, seed starting mix, water sprayer, and labels
- Use a light, well-draining potting mix and moisten it slightly.
- Follow the seed packet instructions for depth and spacing. Some like to be sprinkled on top, such as tomatoes, while others need a cozy blanket of soil, like beans
- Label your trays with plant names and sowing dates
- Place your trays in a warm, sunny spot or under grow lights and keep the soil moist but not soggy
- Germination takes time, so don’t despair if those sprouts don’t appear overnight
Seedling adoption
Not feeling the seed-starting vibe? That’s okay—seedlings are like pre-made plant friends, ready to enhance your garden (and plate).
Pros:
- Get instant greenery without the weeks of waiting
- No more tiny seeds scattering across the floor
- Pre-grown seedlings have a higher survival rate than fragile seeds
Cons:
- Choices might be restricted compared to seed options
- You’ll usually end up paying more per plant than you would for seeds
- No witnessing the miracle of life from seed to sprout
If adopting seedlings is your cup of tea, follow these steps to get started:
- Choose healthy plants—look for seedlings with vibrant leaves, sturdy stems, and no signs of pests or diseases
- If your seedlings were raised indoors, gradually expose them to outdoor conditions for a week before planting to avoid transplant shock
- Make holes in your soil according to the seedling’s pot size and plant spacing requirements
- Carefully remove the seedling from its pot and gently place it in the hole, making sure you don’t bury the stem
- Give your new plant friend a good drink to welcome it to its forever home
- Keep an eye on your seedlings in the first few weeks and water them regularly until they’re established
Spacing and depth
Just like humans, plants need their personal space to thrive. Planting them too close or too deep can stunt their growth, so be mindful of their needs.
Different plants have different preferences for how much room they need to spread their roots and leaves, and how deep they want to snuggle into the soil. Getting these factors right is crucial for optimal growth, happy plants, and a thriving garden.
Here are a few examples to illustrate our point:
Lettuce: Give them about 6-8 inches of breathing room between each plant to allow for good air circulation and prevent overcrowding, which can lead to disease.
Zucchini: They like their space, spreading out like furry green dancers on the lawn. Each sprawling vine needs at least 3 feet of room to avoid bumping into its neighbors and competing for resources.
Tomatoes: These thrive with good air circulation, which helps prevent fungal diseases. Plant them about 18-24 inches apart to give them the space they need to bask in the sun and produce juicy fruits.
Beans: Plant them just 1-2 inches deep in the soil, mimicking their natural environment where they’re often nestled close to the surface.
Corn: These towering stalks need a bit more digging to find their footing. Plant corn seeds about 1-1.5 inches deep for optimal root development and support.
Potatoes: They like to keep their sprouts close to the surface for sun exposure. Aim for about 4 inches of soil cover, letting the top “eyes” of the potato peek out slightly.
How to care for your homegrown veggies and herbs
You’ve prepped the soil, planted your little green buddies, and watched them sprout. Now comes the fun (and crucial) part: keeping those leafy friends happy and healthy.
1. Watering and irrigation
Some plants, like leafy greens, are like marathon runners, constantly needing a steady sip. Others, like succulents, are desert dwellers, storing water in their leaves and needing less frequent watering.
Check the moisture level in the soil regularly and water when it feels dry down to your first knuckle or two. Think of it like giving them a refreshing drink at the end of a hot day.
When you do water, aim for a good, deep soak that reaches the roots, not just the surface. This encourages them to grow down deep, making your plants stronger and more resilient.
Also, make sure your pots or garden beds have good drainage. Soggy roots are unhappy roots, and can invite fungal diseases. If water is pooling on the surface, loosen the soil or create drainage holes to prevent waterlogging.
Morning is the best time to water your vegetables. This gives the leaves time to dry off before nightfall, reducing the risk of fungal diseases. Avoid watering in the heat of the day, as the water will evaporate quickly before reaching the roots.
You can also mulch around your plants. This helps retain moisture in the soil and reduces the need for frequent watering.
2. Fertilization
An eco-friendly fertilization option includes compost, manure, and worm castings. They add nutrients slowly over time, improving soil health and providing a steady supply of goodness for your plants.
Commercially available fertilizers come in liquid, granular, or slow-release forms. They offer a concentrated dose of specific nutrients like nitrogen, phosphorus, and potassium. Use them sparingly and follow the package instructions to avoid overloading your plants.
Before reaching for the fertilizer, get a soil test. This helps you understand your soil’s existing nutrient levels and tailor your fertilizer choices accordingly.
Less is often more when it comes to fertilizer. Overfertilization can burn your plants and harm the environment. Start with a light application and monitor your plants’ growth before adding more.
3. Weed and pest control
Those pesky weeds and hungry critters can be the party crashers of your garden paradise. But there are several tactics to help you control them and protect your plants.
Encourage beneficial insects like ladybugs and lacewings in your garden. These natural predators love to snack on weeds and other garden pests, acting like your own little security team. You can attract them by planting companion plants like dill or marigolds, or creating habitats like bug hotels.
For stubborn weeds, sometimes you gotta get down and dirty. Pull them out by hand when the soil is moist, making sure to get all the roots.
Bonus tip: Rotate your crops. Planting different types of vegetables in different areas each year helps disrupt pest populations and prevent soil-borne diseases.
4. Composting
There are two main types of compost pile ingredients:
- Brown materials: Dry, carbon-rich stuff like fallen leaves, shredded paper, cardboard, and wood chips
- Green materials: Wet, nitrogen-rich stuff like fruit and vegetable scraps, coffee grounds, and grass clippings
Layer your brown and green materials in roughly equal parts, like building a delicious compost lasagna. Keep it moist but not soggy, and give it some air circulation. Turn the pile occasionally to help everything decompose evenly.
After a few months, your scraps will transform into dark, crumbly compost that smells like earthy goodness. This magic mix is packed with nutrients that improve soil structure, aeration, and water retention. Add it to your garden beds or potting mix to give your plants a feast they’ll love!
Green and groovy: start growing your own food
And there you have it. From planting your first seed to nourishing your green friends, we’ve covered the essential steps to create a thriving garden paradise.
Embrace the learning, be patient with your plants, and most importantly, have fun. Every wilting leaf and pesky weed is a chance to learn and grow, both you and your garden.