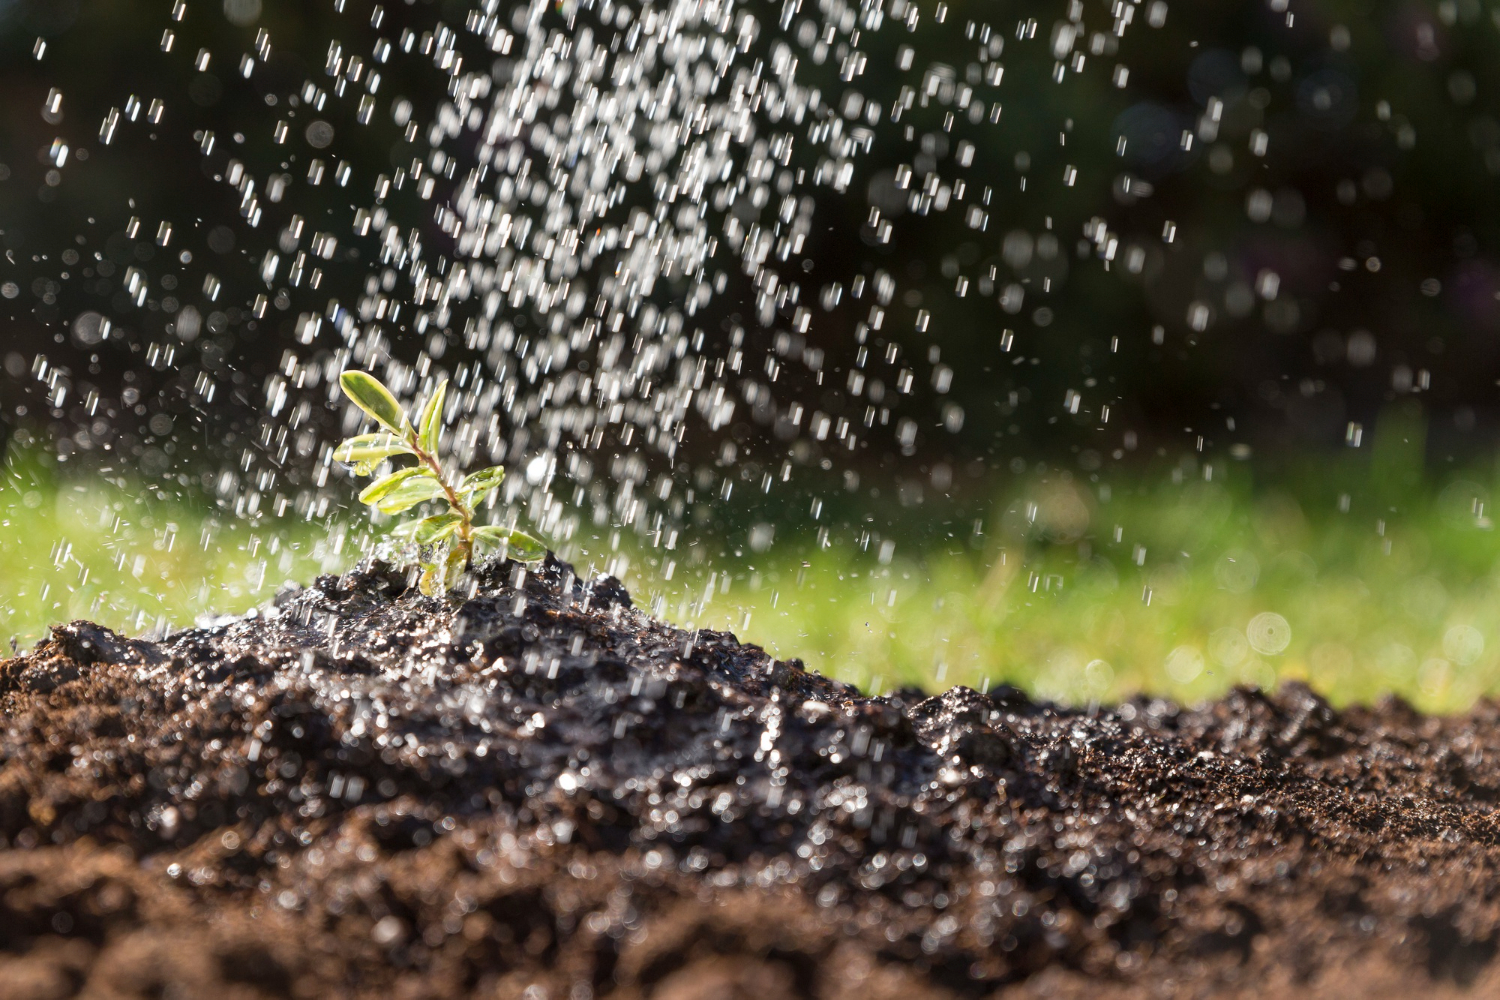
Imagine a lush, green lawn without the hassle of manual watering. You’re about to make that dream a reality! Installing a lawn sprinkler system is easier than you think.
This guide will walk you through every step, from planning and installation to maintenance. Let’s turn your yard into an oasis while saving water and valuable time.
Ready? Let’s dive in!

Prepare for Your Sprinkler System
As you prepare to install your sprinkler system, several vital steps will guide your project to ensure optimal performance and efficiency.
Firstly, you’ll need to plan your sprinkler system layout meticulously. This involves taking into account the specific needs of your lawn or garden, such as the size and shape of the area to be watered, as well as any obstacles or landscaping features that may affect the placement of sprinkler heads.
In addition to the layout, it’s vital to determine various technical aspects of your system. This includes assessing the water pressure in your area, as this will impact the design and effectiveness of your sprinkler system. You’ll also need to consider the size of your water meter and service line, as these will determine the maximum flow rate that your system can handle.
Calculating the flow rate is another crucial element for a successful sprinkler system setup. This involves determining the amount of water that your system can deliver per minute, which will help you determine how many sprinkler heads you can have and how far apart they should be spaced.
1. Determine Individual Sprinkler Flow Rate:
If you already have sprinkler heads or are considering specific ones, check the manufacturer’s specifications. They usually provide the flow rate for each sprinkler head.
If you don’t have this information, you can measure it by timing how long it takes to fill a known volume (like a 5-gallon bucket) and then calculate the flow rate.
2. Calculate Total Flow Rate for Each Zone:
Multiply the flow rate of a single sprinkler by the number of sprinkler heads in one zone.
Total Flow Rate (Zone) = Flow Rate (Single Sprinkler) x Number of Sprinklers in the Zone
3. Calculate Overall Flow Rate for the System:
If you have multiple zones, repeat step 2 for each zone and then sum up the flow rates of all zones.
Overall Flow Rate (System) = Sum of Flow Rates of All Zones
4. Measure Your Home’s Flow Rate:
To ensure your water source can handle the sprinkler system’s demand, you should measure the flow rate from your main water source.
Turn off all water inside and outside your home.
Locate the main water faucet (usually an outdoor spigot) and time how long it takes to fill a known volume (like a 5-gallon bucket). Calculate the flow rate using the formula:
Flow Rate (GPM) = Volume (gallons) ÷ Time (minutes)
This gives you an idea of how much water your source can provide per minute.
5. Compare and Adjust:
Compare the flow rate of your water source to the overall flow rate needed for your sprinkler system.
If your source’s flow rate is lower than the sprinkler system’s demand, you may need to adjust the number of sprinkler heads per zone or consider using sprinkler heads with a lower flow rate.
Remember, it’s crucial to ensure that your water source can supply the necessary flow rate without straining the system. If the demand is too high, you risk reducing the lifespan of your sprinkler system and potentially damaging your water source.
Determine the Water Pressure
Determining the water pressure will dictate how effectively your irrigation will work. To measure this, you’ll need a pressure gauge. Attach this device to a faucet and turn on the water. The indicator will then display your home’s water pressure.
Water pressure is typically measured in pounds per square inch (PSI). Here’s how you can determine the water pressure:
1. Use a Water Pressure Gauge:
The most accurate way to determine water pressure is by using a water pressure gauge. These are readily available at hardware stores.
To use the gauge:
- Turn off all water-consuming appliances and fixtures in your home to ensure no water is being used.
- Attach the water pressure gauge to an outdoor water spigot or a hose bib. Make sure it’s secured tightly.
- Turn on the spigot or hose bib fully. The gauge will display the water pressure in PSI.
- Note down the reading and turn off the spigot or hose bib.
2. Check with Your Local Water Department:
If you’re connected to a municipal water supply, your local water department can provide information about the average water pressure in your area. This won’t be as precise as using a gauge, but it can give you a general idea.
Consider Elevation:
If your property is on a hill or at a higher elevation than the water source, gravity can affect water pressure. Typically, for every 2.31 feet of elevation, water pressure changes by about 1 PSI. If you’re at a higher elevation, your pressure might be lower than the average in your area.
Observe Flow:
While not a precise method, observing the flow of water can give you a rough idea about the pressure. If water gushes out quickly when you open a spigot or faucet, the pressure is likely high. If it trickles out slowly, the pressure is probably low.
Considerations:
If your water pressure is too high (typically over 60 PSI), it can strain and damage household appliances and fixtures. Consider installing a pressure-reducing valve.
If the pressure is too low (typically below 40 PSI), it may not be sufficient for certain appliances or sprinkler systems to function effectively. You might need a water pressure booster pump.
Regularly checking your water pressure and ensuring it’s within the optimal range can help maintain the longevity of your household appliances and ensure the effectiveness of your sprinkler system.
Now, let’s connect these figures with your irrigation system. If you’ve got high pressure but a low flow rate, you might need to install fewer sprinklers per zone or consider utilizing pressure-regulating components. Conversely, if there’s low pressure but a high flow rate, larger-diameter pipes can be beneficial for reducing friction loss and improving performance.
Determine the Water Meter Size
It’s crucial to know your water meter size because it affects the flow rate of your irrigation system. An undersized meter can restrict water flow, impacting the performance of your underground sprinkler system.
To determine your water meter size, locate your main line and identify the meter’s diameter. This information is typically marked on its body or face.
Once you have determined the size, assess if it suits your needs. If you need more clarification, consult with a professional. It’s important to remember that each valve in your water system controls a different zone of sprinklers. Therefore, ensuring these zones receive adequate water supply depends heavily on the meter size.
Determine the Service Line Size
After you’ve got a handle on your water meter size, next up is figuring out the service line size. This crucial step in your sprinkler system installation requires measuring the diameter of the pipe that connects your home to the water main.
Now, don’t worry if it’s buried underground; usually, pipes protrude at ground level near your water meter. You’ll need to determine its size, as this will influence how much water can flow into your home and, subsequently, through your new sprinkler system.
Determine the Flow Rate
You’ll need to figure out your home’s flow rate next, as this is crucial for understanding how much water your new setup can handle. This will help you design an adequate watering schedule.
To determine the flow rate, turn on the highest-flow faucet in your house and fill a large container while timing how long it takes. Then, divide the container’s volume by that time in minutes to get gallons per minute (GPM).
When you install a sprinkler system, use this number to ensure each irrigation zone doesn’t exceed your available GPM. Overloading can result in low pressure and ineffective watering.

Map the Sprinkler System
Let’s now focus on one of the most pivotal stages of setting up an efficient irrigation system: drawing your plan.
You must accurately map out your intended sprinkler layout, considering factors such as the shape and size of your lawn, existing landscaping features, and water coverage needs for different areas.
This exercise is not merely about aesthetics; it’s a technical endeavor that ensures optimal watering efficiency, avoids wastage, and contributes significantly to the health and beauty of your landscape.
Draw Your Irrigation Plan
Drawing your irrigation plan is a crucial step in the installation process. It will help determine where the trenches and sprinkler heads need to go.
Start by sketching out your property boundaries, considering any existing hardscape or garden features.
Next, mark down where you want each sprinkler head to be placed for optimal water coverage. Remember, proper placement prevents overwatering or underwatering.
Consider the location of your valve box; it should be easily accessible but discreetly tucked away.
Now map out your in-ground pipelines that connect each sprinkler head to your main water source and valve box.
Lastly, double-check everything for logistical issues before starting the actual installation process.
This careful planning will ensure an efficient and effective irrigation system tailored specifically to your yard’s needs.
While there are standard guidelines most people follow, here are some unique and lesser-known pieces of advice to consider:
- Use Graph Paper or Digital Tools:
- While many people sketch out their lawn on plain paper, using graph paper or digital landscaping design tools can provide a more accurate scale. This helps in placing sprinkler heads at precise intervals and visualizing the coverage more effectively.
- While many people sketch out their lawn on plain paper, using graph paper or digital landscaping design tools can provide a more accurate scale. This helps in placing sprinkler heads at precise intervals and visualizing the coverage more effectively.
- Factor in Wind Direction:
- While it’s not commonly considered, the prevailing wind direction in your area can affect water distribution. If you’re in a windy region, try to position sprinkler heads so the water is sprayed against the usual wind direction, ensuring better coverage.
- While it’s not commonly considered, the prevailing wind direction in your area can affect water distribution. If you’re in a windy region, try to position sprinkler heads so the water is sprayed against the usual wind direction, ensuring better coverage.
- Consider Plant Growth:
- Plants and shrubs grow over time. When mapping, think about how mature plants might affect the spray pattern in the future. For instance, a shrub that’s small now might block a sprinkler head in a couple of years.
- Plants and shrubs grow over time. When mapping, think about how mature plants might affect the spray pattern in the future. For instance, a shrub that’s small now might block a sprinkler head in a couple of years.
- Soil Absorption Rate:
- Different areas of a garden might have varying soil types. Sandy soil absorbs water faster than clay soil. When mapping, consider placing sprinkler heads closer in areas with sandy soil and farther apart in areas with clay soil to ensure even water absorption.
- Different areas of a garden might have varying soil types. Sandy soil absorbs water faster than clay soil. When mapping, consider placing sprinkler heads closer in areas with sandy soil and farther apart in areas with clay soil to ensure even water absorption.
- Use Flags or Markers:
- Before finalizing your map, place small flags or markers where you intend to position the sprinkler heads. This gives you a real-world visual and allows you to walk through the garden, making necessary adjustments.
- Before finalizing your map, place small flags or markers where you intend to position the sprinkler heads. This gives you a real-world visual and allows you to walk through the garden, making necessary adjustments.
- Nighttime Testing:
- Once you’ve mapped out your system, consider running a test at night. Using a flashlight, you can easily see areas of pooling or spots that aren’t getting enough water, which might not be as apparent during the day.
- Once you’ve mapped out your system, consider running a test at night. Using a flashlight, you can easily see areas of pooling or spots that aren’t getting enough water, which might not be as apparent during the day.
- Think About Future Landscaping Plans:
- Suppose you have plans to add a garden bed, pond, or any other landscaping feature in the future. Account for it in your current mapping. This foresight can save you from having to redo the entire system later on.
- Suppose you have plans to add a garden bed, pond, or any other landscaping feature in the future. Account for it in your current mapping. This foresight can save you from having to redo the entire system later on.
- Consult with a Local Expert:
- Every region has its unique challenges, from soil type to local pests. Consulting with a local gardening expert or landscaper can provide insights specific to your area, which might be rare.
Choose a Sprinkler System
As you choose a sprinkler system, you must recognize the importance of selecting appropriate sprinkler heads. You’ll need to determine the type of sprinkler head that best suits your needs, whether pop-up, rotor, or another variety.
Additionally, you’re also tasked with deciding on an overall sprinkler system type; options include systems like drip or soaker, among others.
Determine Sprinkler Head Type (e.g., pop-up, rotor, etc.)
You must understand the different types of heads available for irrigation, such as pop-up or rotor, to make an informed decision.
While installing your sprinkler system, you’ll dig a trench and lay PVC pipe along its length. Depending on your choice of head, you may need to adjust the depth of the trench.
Pop-up heads are great for lawns as they retract when not in use; rotor heads cover larger areas, making them ideal for big lawns.
After laying the pipe, install each head at designated intervals using appropriate fittings. Remember to attach the correct nozzle to each head based on watering needs.

Install the Sprinkler System
In this guide, you’ll delve into the nitty-gritty details of installing a sprinkler system.
You’ll learn to dig for your sprinkler system properly, assemble it, and connect it to your service line.
We won’t stop there; we’ll also cover how to attach the heads and install backflow prevention measures, ensuring that your irrigation project is efficient and safe.
Dig for Your Sprinkler System
Before you begin digging trenches for your sprinkler system, it’s crucial to locate the water source pipe and avoid any damage to existing infrastructure in your yard.
Innovation comes into play when using a tee fitting. This fitting enables you to branch off from the main water supply. Connect the tee fitting to a riser, which extends vertically from your pipeline and grants access to each sprinkler head.
Consider installing an automatic timer at this point. It’ll allow precise control of watering times, optimizing efficiency and saving you time in the long run.
Remember that patience is key during installation. Taking care now will ensure less maintenance down the line.
Embrace this task as an opportunity, not just an obligation!
Assemble the Sprinkler System
After digging those trenches, it’s time to get your hands dirty and assemble the irrigation components.
First, you’ll want to lay your PVC pipe along the trench routes according to your system plan. Connect these pipes using couplings and good-quality PVC cement. Remember to splice in tee fittings at locations you’ve planned for sprinkler heads.
Next, turn your attention to the valve box. Here, you’ll assemble the manifold and attach zone valves. Once completed, connect this assembly to the main water line using more of that trusty PVC pipe.
After ensuring secure connections throughout, cover up your hard work with soil, but leave markers where each sprinkler head will be installed – that’s next on the agenda!
Connect the System to the Service Line
We’re ready to connect the irrigation network to the main service line. You’ve come far, and this next step is crucial for a functional system.
Turn off your water at the meter – safety first! Then, cut into the main water line. Here’s where precision matters. You’ll splice in a tee fitting – don’t rush it; accuracy is vital.
Next up, glue a 90-degree PVC elbow onto a male PVC adapter. Thread this adapter into that tee fitting you just installed. Considering hiring a professional plumber for this step isn’t out of place – we understand if it seems daunting.
Once done, test your connection. Turn on the meter and check for leaks or drips around your new fittings.
Congratulations! Your irrigation network is one step closer to completion.
Connect the Heads
Having successfully connected your system to the service line, let’s move on to one of the most critical steps in sprinkler system installation: connecting the heads.
Your choice of sprinkler heads is crucial as it affects overall efficiency, so opt for models that meet your lawn’s specific requirements. Once you’ve made your selection, position each head at designated spots along your trench lines.
Connect them using specially designed riser pipes and ensure they’re flush with or slightly below ground level to avoid causing hazards or damage from mowing equipment. Double-check all connections for tightness before proceeding further.
This meticulous process ensures optimal water distribution and a lush, healthy lawn all year round. Remember, precision here will pay off extensively in the long-term performance and sustainability of your watering system.
Install Backflow Prevention
It’s time to install the backflow prevention device, which is vital for preventing contaminants from entering your water supply. First, ensure you comply with local codes; some municipalities require a licensed plumber to handle this step.
Locate the main water line: this is where you’ll install the backflow preventer. You’ve got two options here – an atmospheric vacuum breaker or a pressure vacuum breaker. If you’re going for a top-of-the-line, innovative solution, opt for a pressure vacuum breaker, as it offers superior protection.
Attach it directly to the mainline, following manufacturer instructions closely. Once installed, it’s critical to test the device regularly to ensure optimal operation and safety of your water supply.
With this cutting-edge installation in place, rest assured that your sprinkler system operates efficiently and safely.

Control the Sprinkler System
In this upcoming section, you’ll delve into the crucial steps of determining your sprinkler system’s watering duration and setting its frequency.
Understanding these factors is critical not only to maintaining a healthy lawn or garden but also to conserving water and ensuring optimal efficiency.
We’ll unpack the technical aspects in an informative manner, giving you the necessary knowledge to manage your irrigation system effectively.
Determine Watering Duration
You’ll need to calculate the watering duration for your sprinkler system based on factors like soil type, climate, and lawn size. Here’s a tip: sandy soils absorb water more quickly than clay soils, so adjust accordingly. Be mindful of your local climate – arid regions require more frequent watering than humid ones.
Innovatively, you can utilize a smart irrigation controller that adjusts watering patterns based on real-time weather data. Measure your lawn’s square footage to determine how much water it needs. For instance, an average lawn needs about 1 inch of water per week.
Remember to split this into several watering sessions to prevent runoff and ensure deeper soil absorption. With these details in mind, you’re well-equipped to optimize your sprinkler system’s efficiency while conserving water.
Here’s a step-by-step guide on how to determine the ideal watering duration for your garden or lawn:
- Understand Your Plants’ Needs:
- Different plants have varying water requirements. For instance, a vegetable garden might need more water than a rock garden or a cactus patch. Research the specific water needs of the plants in your garden.
- Different plants have varying water requirements. For instance, a vegetable garden might need more water than a rock garden or a cactus patch. Research the specific water needs of the plants in your garden.
- Check the Soil Depth:
- Perform a “catch can” test to determine how long it takes for water to penetrate the soil to the desired depth:
- Place small containers (like tuna cans) around the area you’re watering.
- Turn on your sprinkler or irrigation system.
- Check the containers every 15 minutes to see how much water they’ve collected.
- Once they’ve collected about an inch of water, note the time. This duration is a good starting point for how long you should water.
- Perform a “catch can” test to determine how long it takes for water to penetrate the soil to the desired depth:
- Consider Soil Type:
- Sandy soil: Drains quickly so that you might need shorter, more frequent watering sessions.
- Clay soil: Retains water longer, so you might need longer, less frequent watering sessions to ensure deep penetration.
- Factor in Sprinkler Output:
- Different sprinkler systems and drip lines release water at varying rates. Check the manufacturer’s specifications for the output rate (usually in gallons per minute or GPM). This will help you calculate how long it takes to deliver the desired amount of water.
- Different sprinkler systems and drip lines release water at varying rates. Check the manufacturer’s specifications for the output rate (usually in gallons per minute or GPM). This will help you calculate how long it takes to deliver the desired amount of water.
- Adjust for Weather Conditions:
- On hotter, windier days, evaporation rates are higher, so you might need to water for a longer duration. Conversely, on cooler or overcast days, you can reduce the watering duration.
- On hotter, windier days, evaporation rates are higher, so you might need to water for a longer duration. Conversely, on cooler or overcast days, you can reduce the watering duration.
- Use Technology:
- Soil moisture sensors can help determine how wet or dry the soil is, allowing you to adjust the watering duration accordingly.
- Smart irrigation controllers can adjust watering durations based on real-time weather data.
- Monitor and Adjust:
- After watering, check the soil to see if it’s moist to the desired depth. If it’s too dry, increase the watering duration. If it’s too wet, decrease the duration.
- Observe your plants. Signs of overwatering include yellowing leaves, mold, or algae. Signs of underwatering include wilting or browning leaves.
- Establish a Routine:
- Once you’ve determined the ideal watering duration, establish a routine, but remain flexible. Regularly reassess and adjust as conditions change.
- Once you’ve determined the ideal watering duration, establish a routine, but remain flexible. Regularly reassess and adjust as conditions change.
- Consult Local Resources:
- Local agricultural extensions or gardening clubs often have resources and guidelines tailored to the specific needs of your region.
Remember, the goal is to provide enough water to moisten the soil to the depth of the plant’s root system, ensuring healthy growth without wasting water. Regular observation and adjustment are vital to finding the perfect watering duration for your garden or lawn.
Set Watering Frequency
Setting the watering frequency isn’t just about turning on the taps; it’s a careful balancing act that depends on weather conditions, soil type, and plant needs. You’re not only aiming for a lush green lawn but also maximizing water efficiency.
Your sprinkler system should be programmed according to local climate and rainfall patterns. If you’re dealing with sandy soil, it’ll require frequent but short watering cycles to prevent runoff. For clay soils, they need less frequent but deeper watering to ensure moisture reaches the root zone.
Remember seasonality! In hotter months, you might need to increase frequency, while in cooler or rainy periods, reducing it might be necessary. Stay innovative by investing in smart controllers that adjust watering based on real-time weather data for optimal results.
Test the Sprinkler System
Now that you’ve got your sprinkler system installed, it’s time to test its functionality and efficiency.
Start by running a comprehensive system check; this will help identify any potential issues or malfunctions within the setup.
Once you’re sure everything’s working as it should, turn your attention towards the spray patterns and coverage – these may need adjusting to ensure optimal watering for all areas of your lawn or garden.
Run a System Check
It’s crucial to run a system check after installing your lawn sprinkler to ensure it’s functioning properly and efficiently. You’ll need to monitor each zone individually, looking at the coverage of the sprinkler heads and how well water is dispersed. Check for leaks or malfunctions in the pipeline, valves, fittings, and risers.
Be observant of clogged nozzles or damaged components that might compromise performance. Remember, it’s not just about ensuring all parts are working but also about optimizing water use. Make necessary adjustments based on plant needs and weather conditions.
Regular maintenance checks can prevent significant issues down the line while saving you time, money, and precious resources. Innovation doesn’t stop at installation; it continues with smart management of your irrigation system.
Adjust Spray Patterns and Coverage as Needed
You must fine-tune each spray pattern and coverage area for optimal watering. This crucial step ensures water isn’t wasted, reaching every inch of your lawn.
Start by turning on one zone of your system at a time and observing the spray patterns. Use a screwdriver to adjust the tiny screw atop each sprinkler head; turn it right or left to modify the arc of water.
For distance adjustments, examine the nozzles on each sprinkler head. If there’s too much or too little coverage, switch out the nozzle with a higher or lower gallon-per-minute (GPM) rating.

Maintain Your Sprinkler System
In maintaining your sprinkler system, there are several key aspects you’ll need to focus on.
You’ll need to regularly check the water pressure and adjust the sprinkler heads to ensure optimal watering coverage.
It’s also crucial to keep an eye out for potential leaks, unclog any blocked sprinkler heads, and promptly replace any that are damaged or malfunctioning.
Check the Water Pressure
We’ll need to check the water pressure before installing the sprinkler system to ensure it’s adequate for efficient operation. You can do this using a pressure gauge that attaches to an outdoor faucet. Turn on the tap and read the measurement on the dial; you aim for a range between 40 and 70 psi for most residential systems.
Next, calculate your home’s water flow rate by timing how long it takes to fill a five-gallon bucket from the same faucet. Divide your result into five; this will give you your flow rate in gallons per minute (gpm).
These critical numbers will guide your equipment choices and system design, ensuring optimal performance of your sprinkler system. Remember, knowledge is power when planning innovative irrigation solutions!
Unclog Sprinkler Heads
It’s essential to regularly check and unclog the heads of your irrigation units for optimal performance. Over time, debris can build up in these heads, reducing water flow and potentially causing damage. Here’s how you can tackle this issue effectively.
First, turn off your irrigation system to prevent accidents or additional clogging.
Next, carefully remove the affected sprinkler head from its housing – you’ll often find it simply screws off.
Rinse the head under a faucet to dislodge any visible debris. For stubborn blockages, use a thin wire or needle to poke through the nozzle hole gently.
Once clean, reattach the sprinkler head securely back onto its stem.
Switch on your system and observe if there’s improved water flow.
Regular maintenance ensures the top-notch functionality of your innovative irrigation system.
Adjust the Sprinkler Heads
Having successfully unclogged the sprinkler heads, it’s time to fine-tune your lawn irrigation system.
Let’s focus on adjusting the sprinkler heads for optimal water distribution. Each head has a tiny screw at the top; by turning this, you can control the spray distance and pattern. Make sure they’re positioned correctly and not spraying onto sidewalks or buildings.
If you find water pooling around a sprinkler head, adjust its angle so it sprays more horizontally than vertically. Remember, too steep an angle wastes water, and too low may not cover enough area; balancing is vital here.
Also, check for consistent pressure among all zones to ensure equal watering across your lawn. Properly adjusted sprinklers promote efficient water usage, contributing to environmental sustainability and cost-effectiveness.
Look for Leaks
You’re now ready to examine your irrigation setup for any leaks that could waste water and potentially damage your yard.
Begin by turning on each zone of your sprinkler system, one at a time, and observe the spray patterns. Look for areas where water is spurting or pooling abnormally – these are likely signs of a leak.
Next, inspect all exposed portions of your pipes and the sprinkler heads. If you notice any wet patches in the surrounding ground when the system isn’t running, you’ve probably got a leaking pipe.
Remember to check valve boxes too! These can fill with water if there’s an issue with their seals.
With this systematic approach, you’ll ensure optimal performance from your innovative irrigation system.
Replace Damaged or Malfunctioning Sprinkler Heads
Should you discover any damaged or malfunctioning heads during your inspection, they’ll need to be replaced to keep your irrigation running efficiently. Begin by turning off the water supply to prevent further damage.
Use a shovel to dig around the faulty sprinkler head carefully, then unscrew it from the riser beneath.
Don’t simply grab a random replacement head – make sure it matches the specifics of your system for optimal performance. Once you’ve got the right one, screw it onto the riser hand-tight; avoid over-tightening, as this can cause cracking.
Finally, test your new head by turning on the water supply and observing its operation. If everything looks good, fill any surrounding holes with soil and pat down firmly.
You’re now back on track for an efficient watering schedule!
Fix Damaged Pipes
If there’s damage to the pipes, it’s crucial to repair them promptly to avoid further complications. You’ll need a pipe cutter, PVC primer, and cement, as well as new sections of pipe or fittings for repairs. Cut out the damaged area and clean both ends of the remaining pipe with your primer. Apply PVC cement around these edges and insert your replacement piece into place.
In more severe cases where an entire line must be replaced, you must dig up the affected area first. After replacing the line, refill the trench carefully without damaging your newly installed piping.
Always test your system after repairing any damage to ensure proper functionality has been restored. Don’t hesitate–get innovative in solving any sprinkler system issues!
Winterize the Sprinkler System (for cold climates)
Now that you’ve repaired damaged pipes in your lawn sprinkler system, it’s time to focus on winterizing it.
This is particularly crucial if you’re based in a cold climate where freezing temperatures can wreak havoc on your irrigation setup.
Begin by turning off the water supply to the sprinkler system. Then, drain all water from the pipes and components using manual or automatic drain valves. Pay attention to the backflow preventer; it’s susceptible to damage from trapped water as well.
Insulate any above-ground piping and consider installing a protective cover over exposed sprinkler heads to protect against frost.
Lastly, disconnect and store your controller indoors to avoid electrical complications due to winter weather conditions.

Conclusion
After all your hard work, you should now have a fully functional lawn sprinkler system. Remember, ‘the devil is in the details,’ so keep up with regular maintenance and adjustments for optimal performance.
You’ve invested time and money into this project – don’t let it go to waste. This isn’t just about watering grass; it’s about nurturing your home’s beautiful exterior.
Here’s to lush lawns and flourishing gardens!