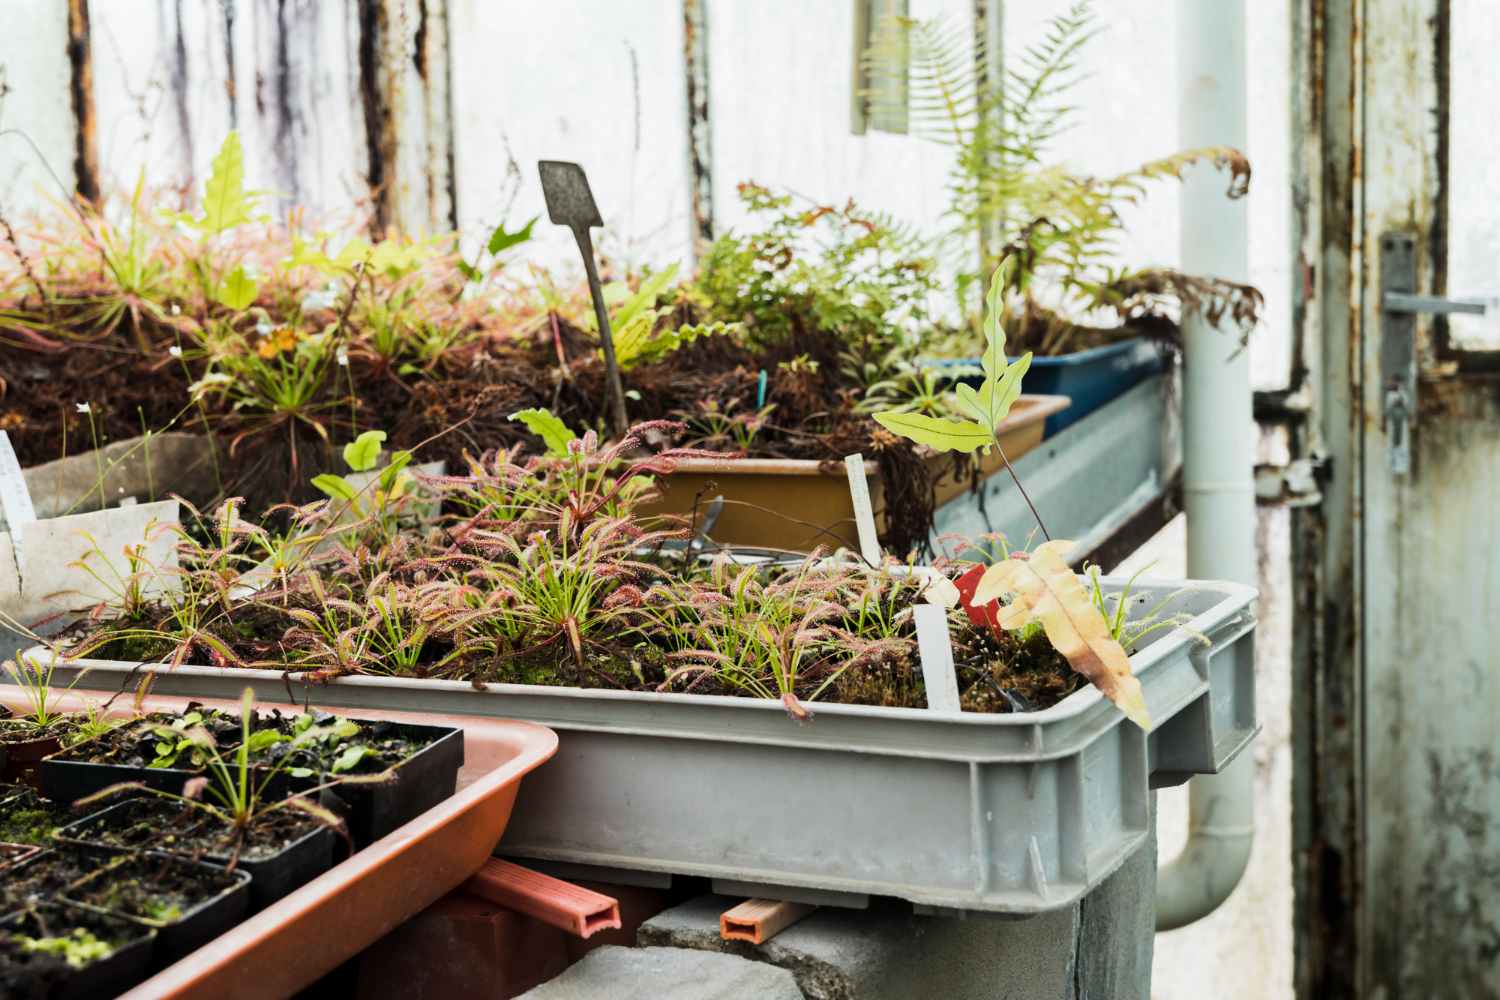
Limited space isn’t an obstacle to growing your favorite plants; container gardening lets you create a green oasis anywhere you want. Learn how.
Container gardening lets you turn a balcony, patio, or a sunny spot in your house into a lovely garden. All you need to do is grab some containers, soil, and your favorite plants, and you’re all set.
Plus, you can move your plants around to ensure they get the sunlight or rearrange them to redecorate your space. Grow anything from herbs and colorful flowers to your own veggies; learn how in this guide.
Step 1: Choose containers and location
When it comes to containers, you can opt for pots, buckets, or hanging baskets made of terracotta, wood, plastic, or fabric. Each material has its benefits:
- Terracotta is breathable, but it dries quickly and requires frequent watering.
- Wood provides excellent insulation and moisture retention. Cedar and redwood, for instance, are rot-resistant and can last for years.
- Plastic is lightweight and durable, available in various sizes, and cost-effective. It retains moisture well but may require additional drainage holes.
- Fabric offers excellent aeration, preventing root circling and promoting air pruning.
Consider the grown-up size of the plants you wish to grow when selecting container sizes. For instance, small herbs need containers at least 6 to 8 inches in diameter for adequate root space. Vegetables or larger plants need containers with a diameter of 12 inches or more to support their growth and root development.
Container garden location
Lastly, consider your space’s microclimate, including sunlight, temperature, and wind exposure, to determine the ideal location:
- Sunlight exposure: Check how much direct sunlight your chosen spot receives throughout the day. Herbs like basil and rosemary flourish in full sun (at least 6 hours daily), while lettuce and spinach prefer partial shade.
- Temperature: In some spots, the temperature might be warmer or cooler because of walls, buildings, or nearby structures. Avoid placing plants sensitive to temperature changes in these areas.
- Wind exposure: Wind dries out soil and stresses plants. Shelter sensitive plants or use windbreaks to protect them from strong winds.
Step 2: Select the right soil and plants
Potting mix
Think of soil as a foundation for your plants; a good potting mix is a nutritious meal for them. Here is what to look for:
- Nutrient-rich blend: Look for mixes that contain organic matter like compost, which nourishes plants and supports microbial life.
- Well-draining medium: Drainage prevents waterlogging and root rot. Opt for mixes that include perlite, vermiculite, or coarse sand to improve drainage and aeration.
- pH-balance: Most plants thrive in a moderately acidic or neutral pH range (around 6.0 to 7.0) – ensure your potting mix has it.
Note: You can create your potting soil, too. Mix equal amounts of coconut coir or peat moss (for holding moisture), compost (for nutrients), and perlite or coarse sand (for drainage).
Plants selection
When choosing plants, consider what you like, how much space you have, and what each plant needs. Here are some examples of plant varieties suitable for container gardening:
- Herbs: Mint, chives, and parsley are great for containers. Mint spreads a lot, so keep it in its pot. Chives are easy to grow, look nice, and add flavor to food. Parsley grows well in containers, and you can keep picking it.
- Flowers: Petunias come in various colors, add vibrancy to your garden, and are relatively low-maintenance. Marigolds repel pests, come in different sizes and colors, and always look pretty.
- Space-saving vegetables: Dwarf tomato varieties like Tiny Tim or Patio Princess produce delicious fruits in smaller spaces. Zucchini varieties Spacemiser or Eight Ball are bred specifically for containers.
Some plants do better when they’re near certain other plants. For example, basil planted next to tomatoes can make the tomatoes taste better and keep pests away.
Step 3: Planting and maintenance
We’ll take you through the planting process, step by step. Before you start planting, make sure you’re prepped: create holes at the bottom of your containers for water to drain. You can also put a gravel or broken pottery layer at the bottom to help drainage.
Carefully remove plants from their store containers. Squeeze the container and flip it to get the plant out without pulling on the stem. If the roots are all bunched up, gently spread them out.
Make a hole in the soil and put the plant at the same depth it was in its first container. Fill the gaps with more soil and gently pat them.
Consider plants grown-up size and don’t put them too close together in containers, as they’ll need room to grow and get nutrients.
Here are a few maintenance tips to make sure your container plants thrive:
- Different plants need different amounts of water. Use the “finger test” to check moisture levels. Water when the top inch of soil is dry, but don’t exaggerate.
- Place containers on drip trays to collect extra water. You’ll prevent surface damage and allow plants to absorb moisture as needed.
- Fertilizers will give your plants extra nutrients. Use slow-release fertilizers or homemade ones like compost tea or fish emulsion. Just follow the directions so you don’t over-fertilize.
- Cut off dead or yellow leaves. For flowering plants, take off old flowers to help new ones grow.
- Adjust care routine according to season. Water more during hot summer months and reduce watering in cooler periods. Protect plants from frost in winter by moving containers inside or providing insulation.
- If your plants get too big for their pots, move them to bigger ones. Repotting usually needs to be done every one to two years.
- If you spot signs of pests or diseases, use natural products like insecticidal soap or neem oil to maintain plant health.
Step 4: Maximizing vertical space
There’s no one-way-fits-all to grow your container garden. Have you thought about making it vertical? Here are a few techniques to try:
- Wall-mounted planters: Attach strong wall-mounted planters to vertical surfaces like walls, fences, or balcony railings. They come in various styles of materials like metal, wood, or plastic to match your space.
- Trellises and lattice: Install these panels against walls or in pots for climbing plants. They help plants grow up, saving space and adding beauty.
- Hanging baskets and vertical planters: Hang baskets on hooks on walls or ceilings. They’re great for growing lots of plants in a small area. Look for designs with layers or shelves for even more space.
Plants suitable for vertical gardening include, for example, climbing roses, which look great on trellises and offer wonderful blossoms and scents. Climbing vines, like ivy or jasmine, are great for growing upwards and can create a natural privacy screen.
Consider vertical edibles, too. Beans, peas, or cucumbers are ideal for trellises. Herbs like thyme, oregano, and mint do well in hanging baskets or vertical planters.
Tips for vertical gardening
- Strong support: Ensure your structures are sturdy and securely anchored to avoid accidents or damage.
- Regular maintenance: Monitor your plants as they grow, and tie them to the supports as needed.
- Watering: Vertical gardens might need more water, as they’re more exposed to sun and wind. Make sure they stay hydrated.
- Accessibility: Set up your vertical garden so it’s easy to prune, pick, and look after plants.
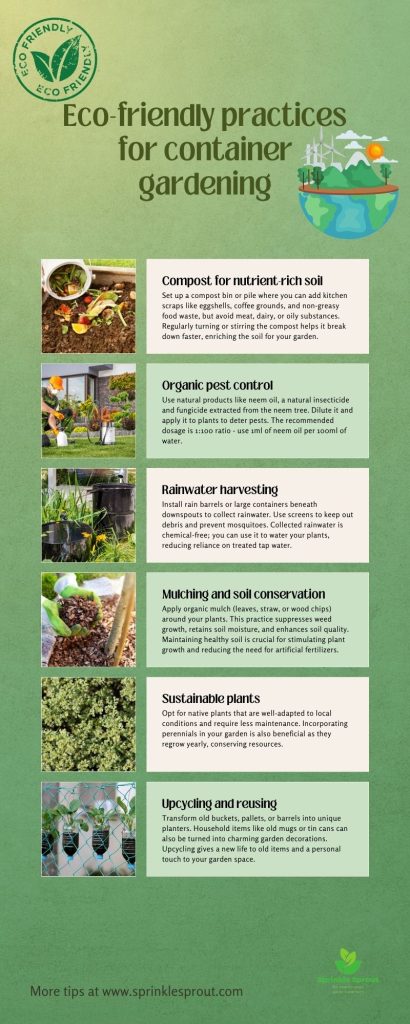
Eco-friendly practices for container gardening
1. Composting for nutrient-rich soil
Start by setting up a compost bin or pile where you can add kitchen scraps like eggshells, coffee grounds, and non-greasy food waste, but avoid meat, dairy, or oily substances. Regularly turning or stirring the compost helps it break down faster, enriching the soil for your garden.
2. Organic pest control
Use natural products like neem oil, a natural insecticide and fungicide extracted from the neem tree. Dilute it and apply it to plants to deter pests. The recommended dosage is 1:100 ratio – use 1ml of neem oil per 100ml of water.
Companion planting is another effective method for organic pest control. For example, marigolds can fend off nematodes, and basil can repel mosquitoes and flies.
3. Rainwater harvesting
Install rain barrels or large containers beneath downspouts to collect rainwater. Use screens to keep out debris and prevent mosquitoes. Collected rainwater is chemical-free; you can use it to water your plants, reducing reliance on treated tap water.
4. Mulching and soil conservation
Apply organic mulch, such as leaves, straw, or wood chips, around your plants. This practice suppresses weed growth, retains soil moisture, and enhances soil quality. Maintaining healthy soil is crucial for stimulating plant growth and reducing the need for artificial fertilizers.
5. Sustainable plants
Opt for native plants that are well-adapted to local conditions and require less maintenance. Incorporating perennials in your garden is also beneficial as they regrow yearly, conserving resources.
6. Upcycling and reusing
Get creative with repurposed items. You can transform old buckets, pallets, or barrels into unique planters. You can also turn household items like old mugs or tin cans into charming garden decorations. Upcycling gives a new life to old items and a personal touch to your garden space.
It’s time to bring your container garden to life
Roll up your sleeves, choose some nice-looking pots, and fill them with potting mix and your favorite plants. Whether you have a small balcony, a sunny windowsill, or a tiny patio, you can turn it into a lush, green oasis. Your container garden will bring nature closer to you, brighten your days, and make it worth the effort.